This page will teach you how to make your own voicebank.
Depending on how much money and time you’re willing to invest into this process, you can get something of varying quality.
The biggest monetary cost when it comes to UTAU would be a microphone. If you happen to have one, recording your first bank on a relatively cheap microphone in a quiet space is a pretty good start. You don’t have to spend money to get a microphone if you don’t want; you can just get creative. If your phone has a decent microphone, you could even record using that.
The next step is getting a reclist, a list of sounds to record. There are some good reclists here. If this is your first UTAU voicebank, you should probably choose a CV reclist. If you’re not familiar with Japanese phonetics, I’d suggest looking into Duolingo or some Japanese pronunciation guides online to make sure you’re pronouncing everything correctly.
Here’s a quick and dirty guide to Japanese pronunciation:
Now you’ll need to record all the samples in your list. If you chose CV, this might take 5-10 minutes. VCV takes more like an hour.
CV samples should be held for about a second and pronounced as clearly as possible. Make sure there are a few seconds of silence between each sample. You can use programs like Audacity to record. Next, you will have to cut up the recording into individual .WAV files. I recommend you save the full recording as a project file or .WAV file before splitting up the samples.
Export each sample as a .WAV file named the same as what it is in the reclist. Make sure there’s a little bit of space at the beginning and end of each sample. PCs can be kind of finicky with editing files and folders in the UTAU directory, so put this folder somewhere like your desktop or documents to avoid any problems. Make sure they are all in the same folder. The next step is to make a few files and then we can put this into UTAU.
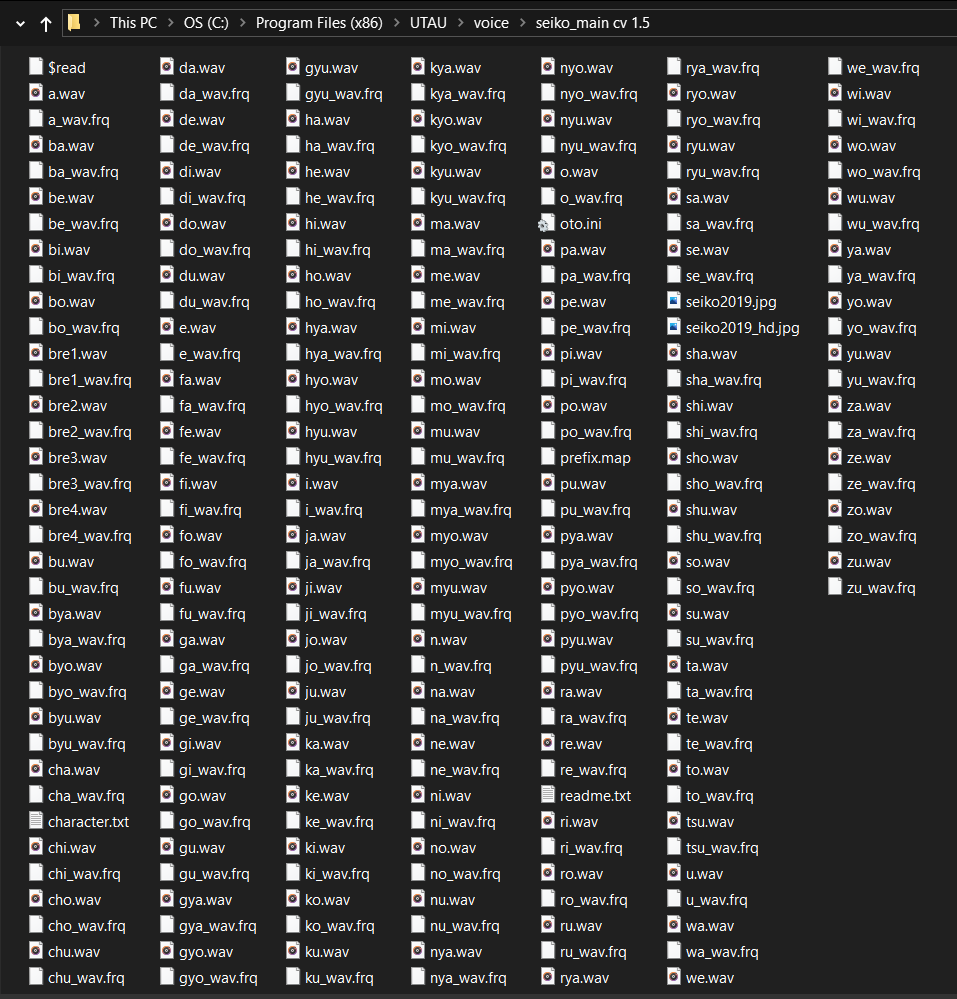
Now, let’s look at a CV voicebank for a second. You can see many different file types here. .WAV we know, those are our recordings. There’s also .frq, .txt, .jpg, and an oto.ini file… Let’s take a closer look at these interesting files.
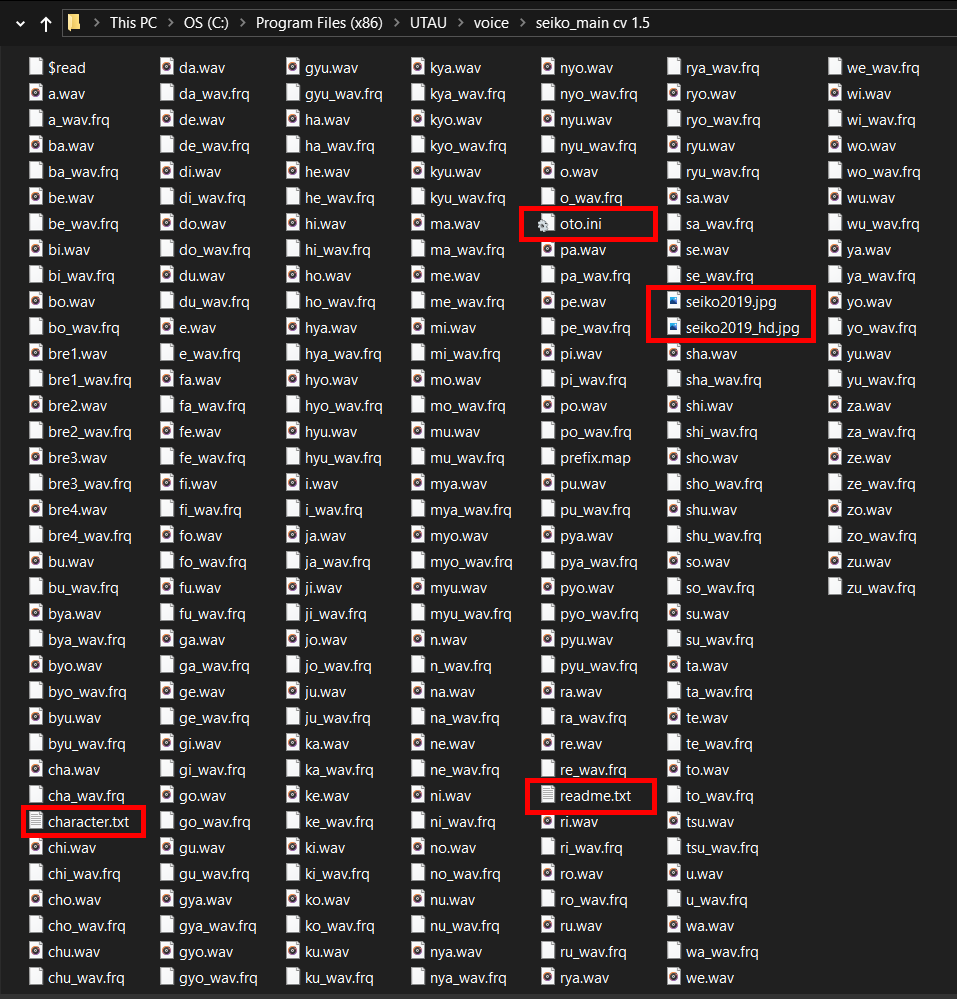
In this second image the interesting files are highlighted in red. We can see a character.txt, a readme.txt, an oto.ini, and two .jpg files. We’ll talk about .frq files later in this tutorial.
Character.txt tells UTAU important information about your voicebank, like their name, the name of the author, what image to display, and a website. Make a new text file and name it “character.txt”. Now open it and write or copy + paste:
name=[your name here]

           author=[how you want to be credited]

           image=[the name of your image]

           web=[your website, if you have one]
Replace the information in the square brackets with your custom information. For example, the character.txt in the voicebank we saw earlier looks like this:
name=Seiko

           author=Mika

           image=seiko2019.jpg

           web=utauseiko.neocities.org
If you don’t know what the name of your image file will be, you can change it later. If you don’t have a website, you can omit that line from the .txt file. Save whatever changes you make and make sure the file is in the same directory as the .WAV files.
Technically, you don’t have to write anything. All you should need is an empty readme.txt if you don’t feel the need for this step. But what readme.txt is the terms of service/usage for your UTAU voicebank: what others can and can’t do with it. There’s a great tutorial on the UTAU wiki that goes more in depth about this if you want to have a solid terms of use laid out. Otherwise, you can skip this step for later.
This is your UTAU’s “settings” in UTAU. This file tells UTAU what part of a sample is the consonant and which is the vowel, when the sample starts and ends, amongst other things. I’m not very good at making otos, so I’ll link a couple of tutorials. You can use plugins like moresampler to generate an oto, or commission someone online to do it for you, if you really don’t want to learn how to oto. All of that is a Google search away.
You can include an image of your UTAU character to display in UTAU’s interface. Don’t worry if you’re not an experienced artist, it doesn’t have to be professional. Or if you want, it can be abstract or a stock photo or just a gradient or icon or something… You can use your imagination here.
This image should be 100 x 100 pixels, preferably in .JPG format. It seems UTAU will take .BMP as well. .PNG files don’t seem to be supported at the moment. You can also include a higher-resolution image with your voicebank for others to use for thumbnail images, videos, etc…
Make sure your name for your image and what you wrote under “image” in character.txt match up. If your image is named MyUtau.jpg, your character.txt should read image=MyUtau.jpg.
Now we can get to the mysterious .frq files. For this, we’re going to take that folder we’ve been working on and put it into our UTAU voice folder. Now we’re going to open UTAU and load our new voicebank!
You should see a pop-up with your UTAU’s name, image, and information when you load their voicebank.
Now we need to generate the .frq files. But what are they? .FRQs are frequency tables created by UTAU that tells the program what pitch you recorded the sample at. This helps UTAU pitch-shift the note to other pitches effectively. If a sample doesn’t have a .FRQ, UTAU will generate one and then use that as reference every time the sample is played again.
To generate .FRQ files (at least for a CV bank), you can render a couple songs with your new bank. If you haven’t made an oto.ini yet or are working on it, your bank will sound kind of funny until it’s finished.
It will take longer to render .FRQs the first time, but UTAU rendering speed will be much faster after they’re made.
And that’s about all you need to know to make your first UTAU voicebank!