This page will teach more intermediate UTAU use, such as:
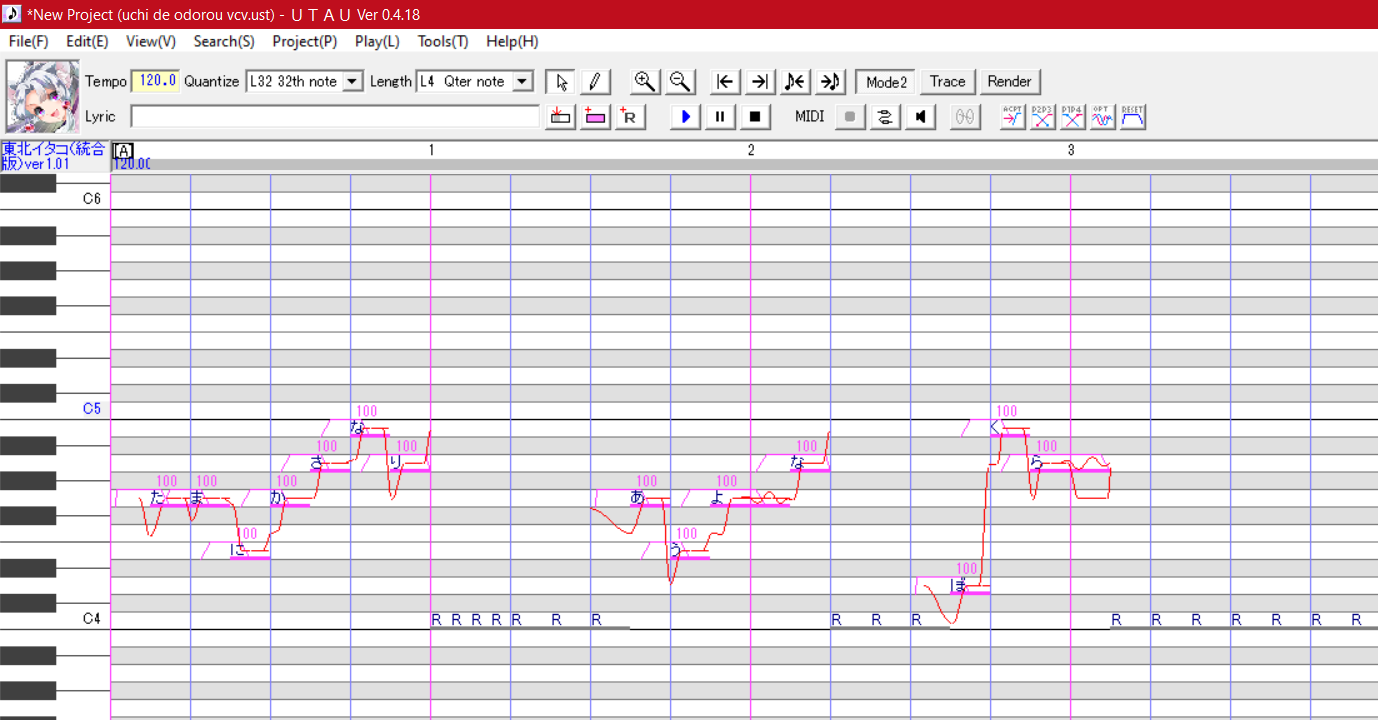
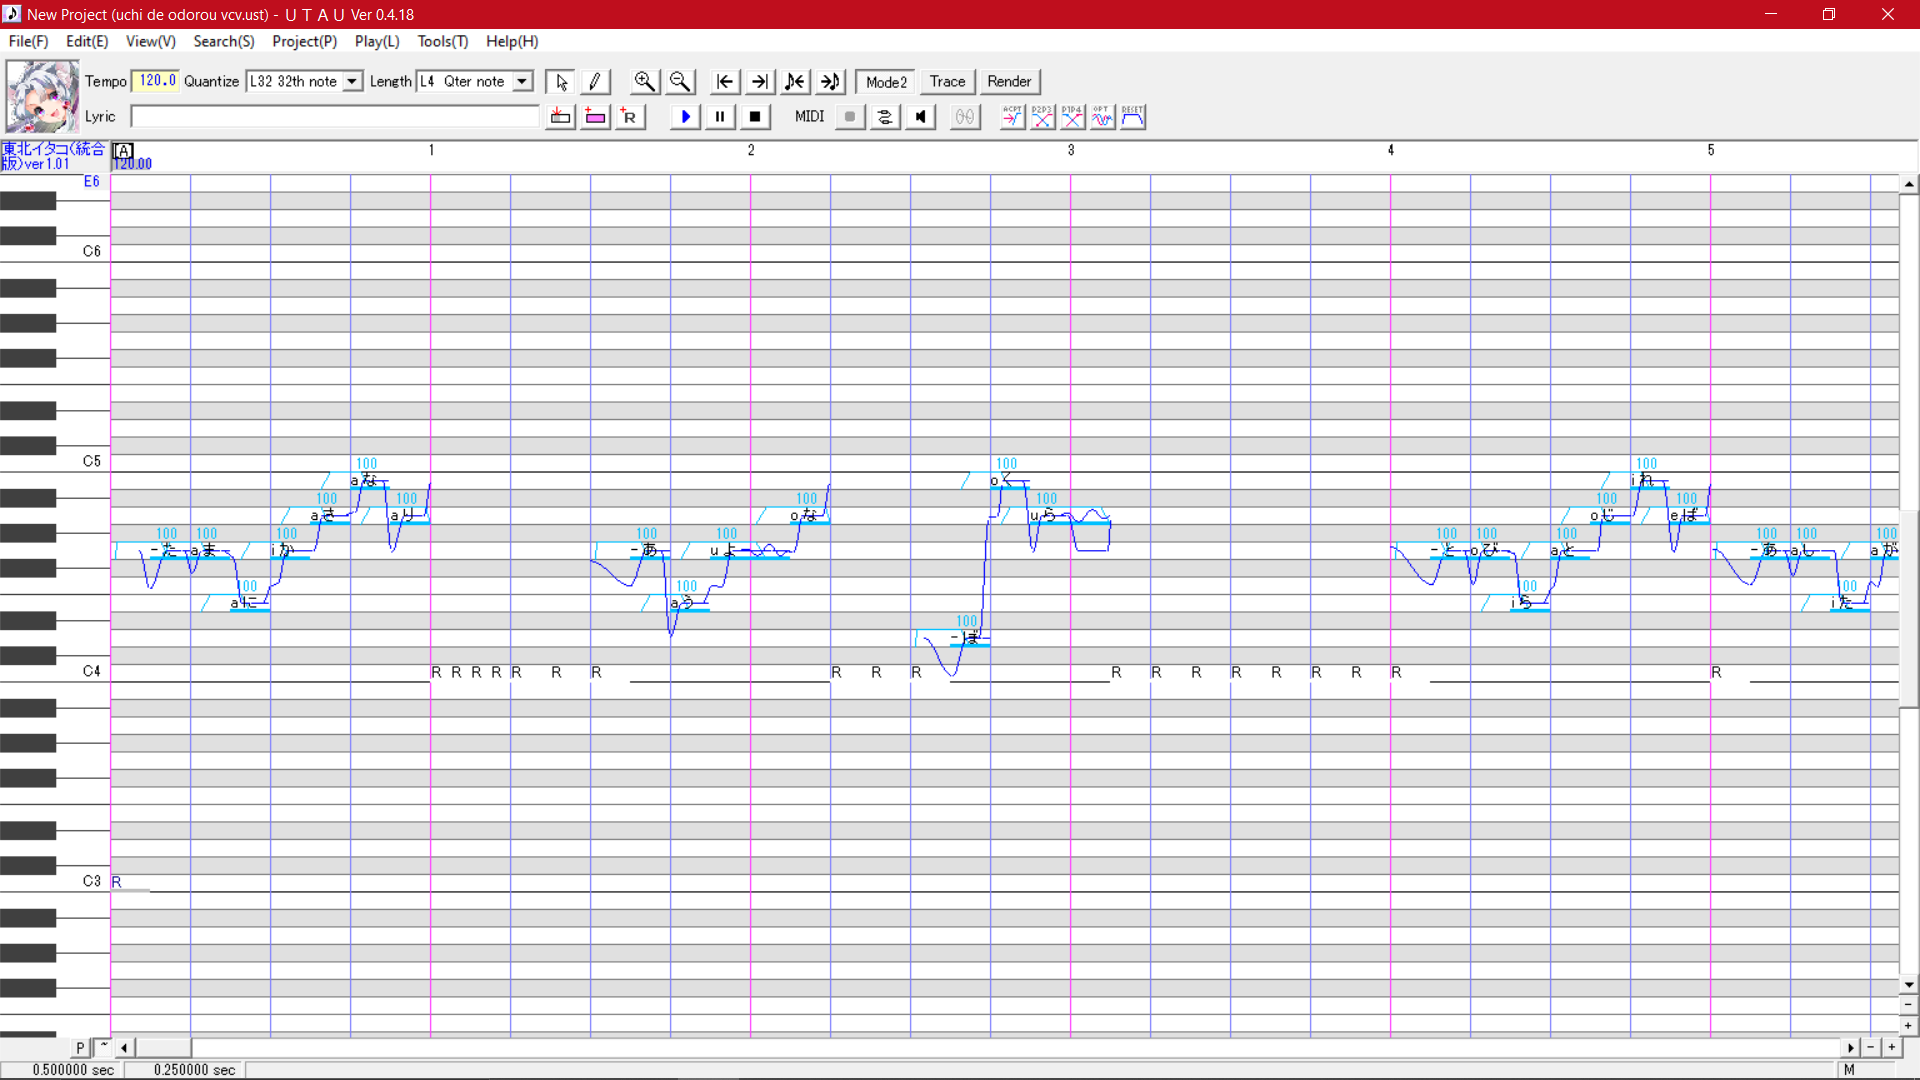
Let’s take a moment to look at the main differences between CV (these are the voicebanks we’ve been using up until this point) and VCV. (This tutorial is covering specifically Japanese voicebanks.)
CV (aka V-CV or CV-V) stands for Consonant Vowel. It basically means that you record a sample for each consonant-vowel and vowel sound in Japanese. Japanese syllables are very different than English ones – English has consonant clusters and lots of vowel sounds, for example. Japanese has five vowel sounds (A E I O U, pronounced like ah, eh, ee, oh, oo), and all words end with a vowel or N. This makes Japanese much easier to record (you only need 80-100 samples recorded for a Japanese CV voicebank!) than English, which would take hundreds of recordings for a very basic bank.
To understand CV better, let’s look at some Japanese words. We’re going to write them out how you would input them in UTAU for a CV voicebank to sing. A slash indicates the syllable is written on a new note.
In short, CV voicebanks write each syllable on one note. It’s a one-to-one ratio!
VCV stands for vowel-consonant-vowel. It’s a more complex and longer to record method that gives much smoother-sounding results. In CV, you make one recording per Japanese syllable. VCV’s recording process is more complicated to explain. You record strings of syllables and through the oto.ini, configure them so that the vowels fade into each other and sound very natural (Similar explanation of VCV on the UTAU wiki).
Let’s look at the same words that we did in the CV section and write them in VCV. Imagine the lowercase letters written as latin letters, and the uppercase letters as hiragana.
With VCV, we blend the vowel sounds, like the RI / i in ringo, and so the syllables are kind of stretched across the notes instead. A string of VCV always starts with the dash (-), and you don’t have to write anything at the end.
Let’s write some short phrases in VCV (with hiragana this time).
To blend vowels in VCV, you follow the same steps as fitting a .UST in CV.
Although VCV may seem hard and tedious to write, with the help of plugins, you won’t have to do much more than write out CV notes and convert them. Let’s look at how to install plugins.
To install plugins, obviously you have to download them first. The most important plugin to download is Bizz’s “The Best Things I Could Think Of, Etc”, also known as Iroiro. This plugin is essentially a swiss knife of convenient things for UTAU. Its main appeal is the ability to convert between VCV and CV and roumaji and hiragana (and vice versa!!!).
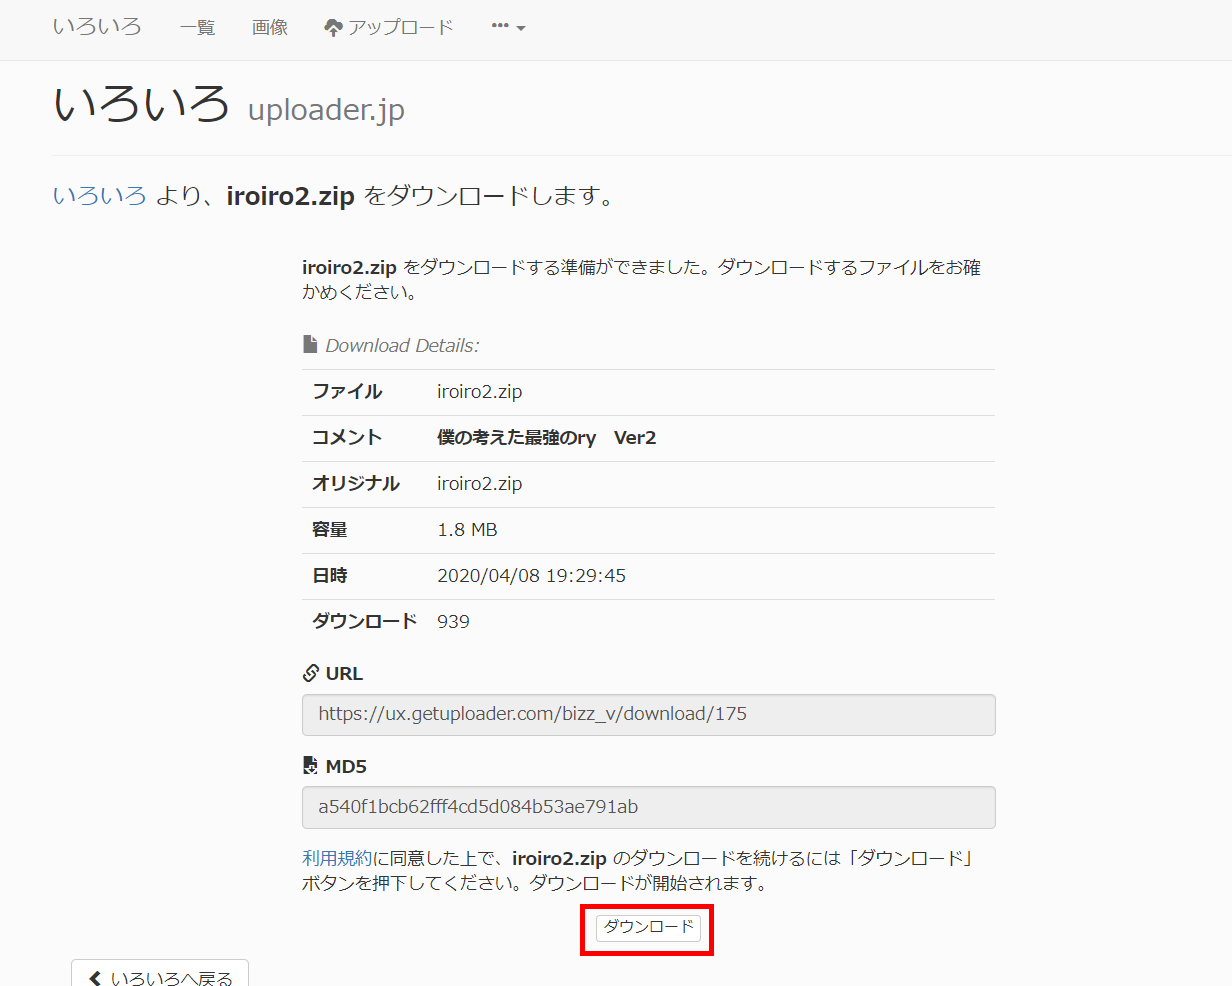
To download Iroiro, visit this link. Choose iroiro2.zip (you should only need to scroll a little bit) and then choose the “ダウンロード” (download) button (you may have to scroll a bit). You will be brought to a new screen with “Thank you for downloading” and either the download will start or you can scroll again and hit “Download now”.
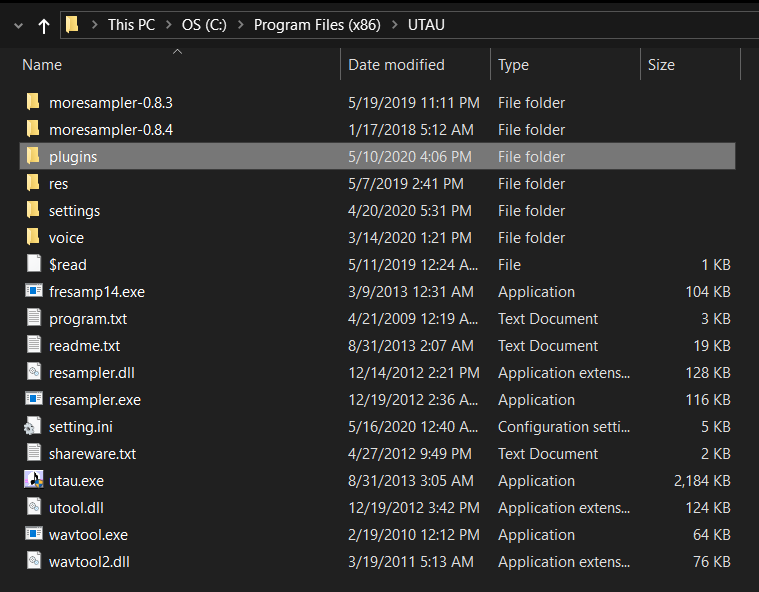
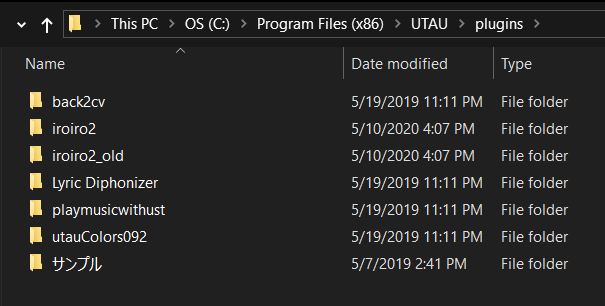
Unzip the file. You will now have a Iroiro2 folder. To install the plugin, navigate to the UTAU folder on your hard drive, This PC > OS (C:) > Program Files (x86) > UTAU.
Click on the plugins folder and look inside. By default, it will probably just have the sample plugin, サンプル (sample). Drag the Iroiro2 folder into the plugins folder. Now open UTAU.
With UTAU open, let’s run the Iroiro2 plugin. Luckily, Iroiro2 has an English interface. To run the plugin, go to Tools > Plugin-Ins within UTAU. If you had UTAU open already, you can choose Reload at the bottom of the Plug-Ins dropdown, and it should find Iroiro2. Iroiro2 will be named “僕の考えた最強のry”, so if you see something with “ry” at the end of it, that’s Iroiro2. Click it and let it run.
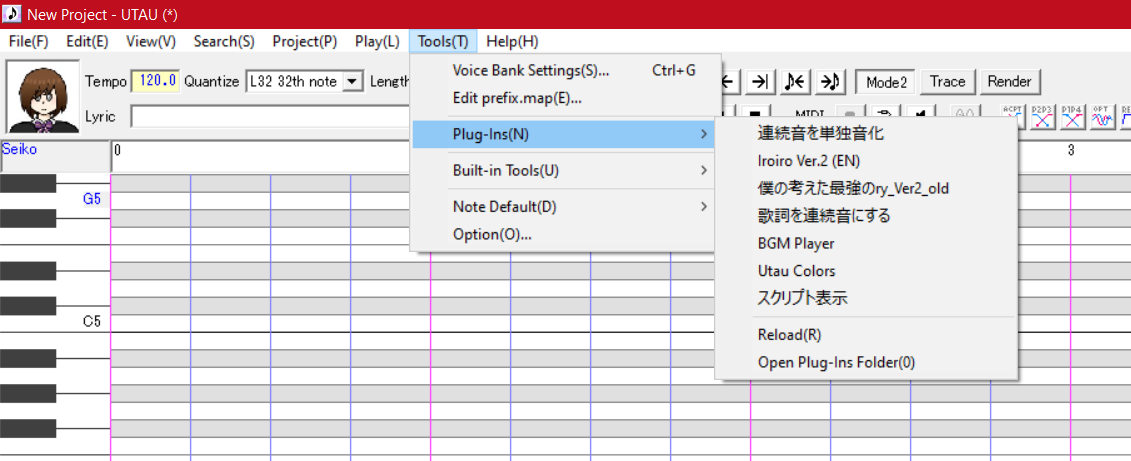
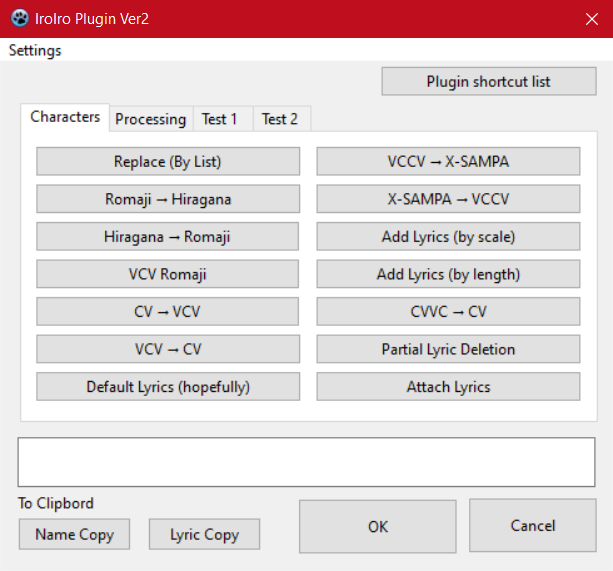
Iroiro2 will open in Japanese, so click the 設定 (settei / Settings) button at the very top-left. The image below shows the location of the Settings button on the English interface. After clicking Settings, check the “Language” box. Iroiro2 will tell you to reload. Choose Reload from Tools > Plug-Ins and now you should see “Iroiro Ver.2 (EN). Awesome!
To use Iroiro2, select the notes you want to convert. Then fire up Iroiro2 and choose how you want to convert them. You will have to check that Iroiro2 converts them correctly, as it can have some issues converting from Hiragana CV to Roumaji CV. Then click “OK” and give Iroiro2 a second to convert the notes.
Note: Iroiro's conversion can be a bit incorrect (especially from roumaji to hiragana - because of differences between standards in romanizing hiragana). Iroiro lets you directly change the conversion table, so if there are errors, you can correct them yourself. After choosing a conversion method (either Romaji to Hiragana, Hiragana to Romaji, CV to VCV, or VCV to CV), you can click "Edit Table" button and correct anything Iroiro tends to get wrong. If you're not familiar with Hiragana, you should pull up a table, like this one.
Another helpful plugin is Play Music With UST aka BGM Player. The linked YouTube video shows how to use it, but to put it simply, install it like you installed Iroiro2. BGM Player is already in English. All you have to do is open it through Plug-Ins. Now, the main feature of BGM Player is that you can use it to play an instrumental at the same time as your UTAU output, but you can also use it to play more than one UTAU window simultaneously.
Simply open your second UTAU winow, then select the notes on each window that you want played at the same time. Render the notes, and run BGM player on the instance of UTAU that has a longer selected note time (you can see this at the bottom left).
Make sure “Play All UTAU Windows” is checked. If BGM Player stops playback suddenly, or the windows play out of sync, click stop and then play again on BGM Player’s window.
The last intermediate thing this tutorial page will teach you is about multipitch voicebanks. Multipitch voicebanks are voicebanks recorded at separate pitches that extend the singing range of the UTAU voicebank. A common amount of pitches in a multipitch voicebank is tripitch, which are three recorded pitches.
For each recorded pitch, treat it as a separate voicebank. Each pitch needs an oto.ini, but you only need one character.txt and readme.txt. You can store these one-time-needed files at the top level of your UTAU’s folder. Then, make one folder for each pitch and place those recordings and the oto.ini inside the folder. For example, if you have a voicebank with pitches A3, E4, and A4, the file hierarchy would look like this:
You can also place one pitch outside of a folder (so the .wav files are at the top-level) and make the other pitches as folders. If you do this, you should make the lowest pitch the “outside” pitch.
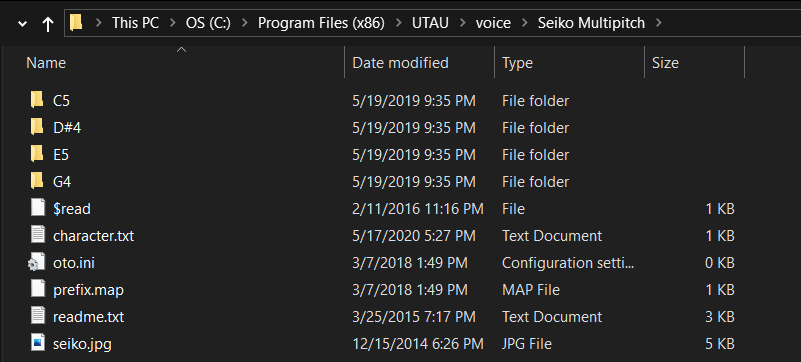
A multipitch voicebank folder showing all of the pitches in folders.

This is what Hakuappoid's multipitch VCV folder structure looks like. The lowest pitch is not contained in a folder.
Now we have to do a couple steps to configure your bank to play the multiple pitches.
The first step is to configure the aliases for each bank. What are aliases? They’re alternate names for each note. This is how we get multipitch banks to work.
Open the oto.ini for each folder-contained pitch in a text editor or Notepad. Write in the name of the recording plus the pitch in the first space after the equals sign. For example, if your folder is an F3 pitch and you have a roumaji cv voicebank, you would write aF3, baF3, beF3, in each space and so on.
Now, to configure these pitches in UTAU, we need to open UTAU with administrator permission granted. Otherwise, you won’t be able to configure the multipitch through this method.
Open UTAU, load your multipitch voicebank, and go to Tools > Edit prefix.map. You are going to choose the pitches that you want each recorded pitch to play on. You can shift-click and choose multiple notes to set the pitch to play on.