This page will teach you how to render a .WAV file in UTAU, and how to fit a voicebank to a UST.
You have your .UST file open and your voicebank loaded but you want to hear some singing! This is how we do that. To make UTAU sing, you need to open a .UST file or create one. Then select the notes you want to hear sung either using the mouse or by pressing Control+A (this selects the entire project). You can select only notes and not rests by pressing Control+W. You can tell the notes are selected when they turn pink and there is a medium gray bar towards the top.
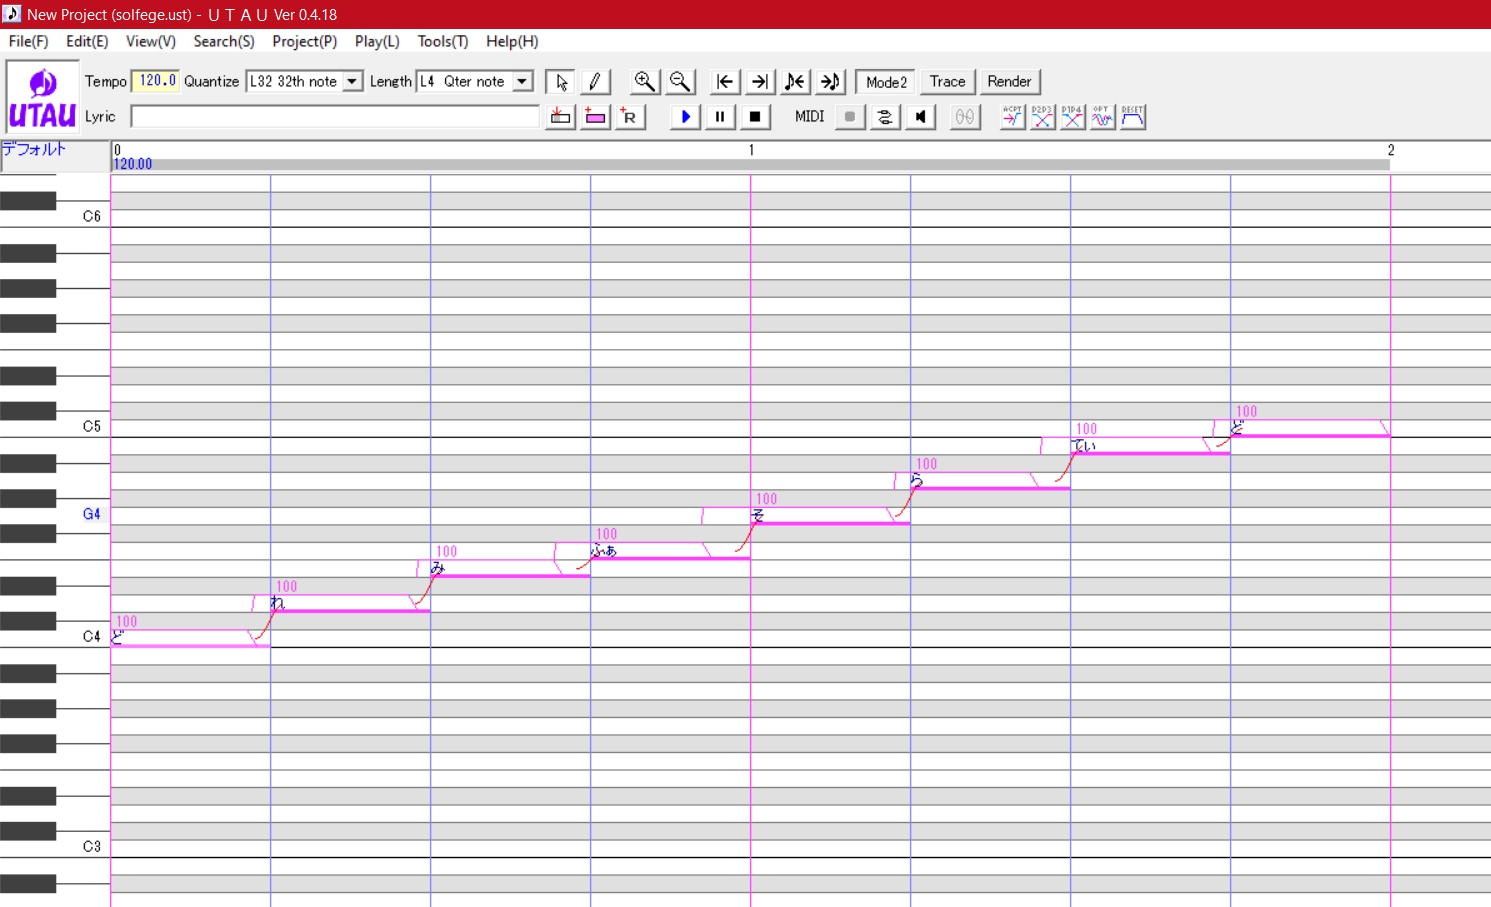
Now that we have our notes selected, you can press Spacebar or click the blue play button on the top toolbar. This opens cmd.exe and UTAU will run its rendering tools to make your singing! Just let the process run until it’s done.
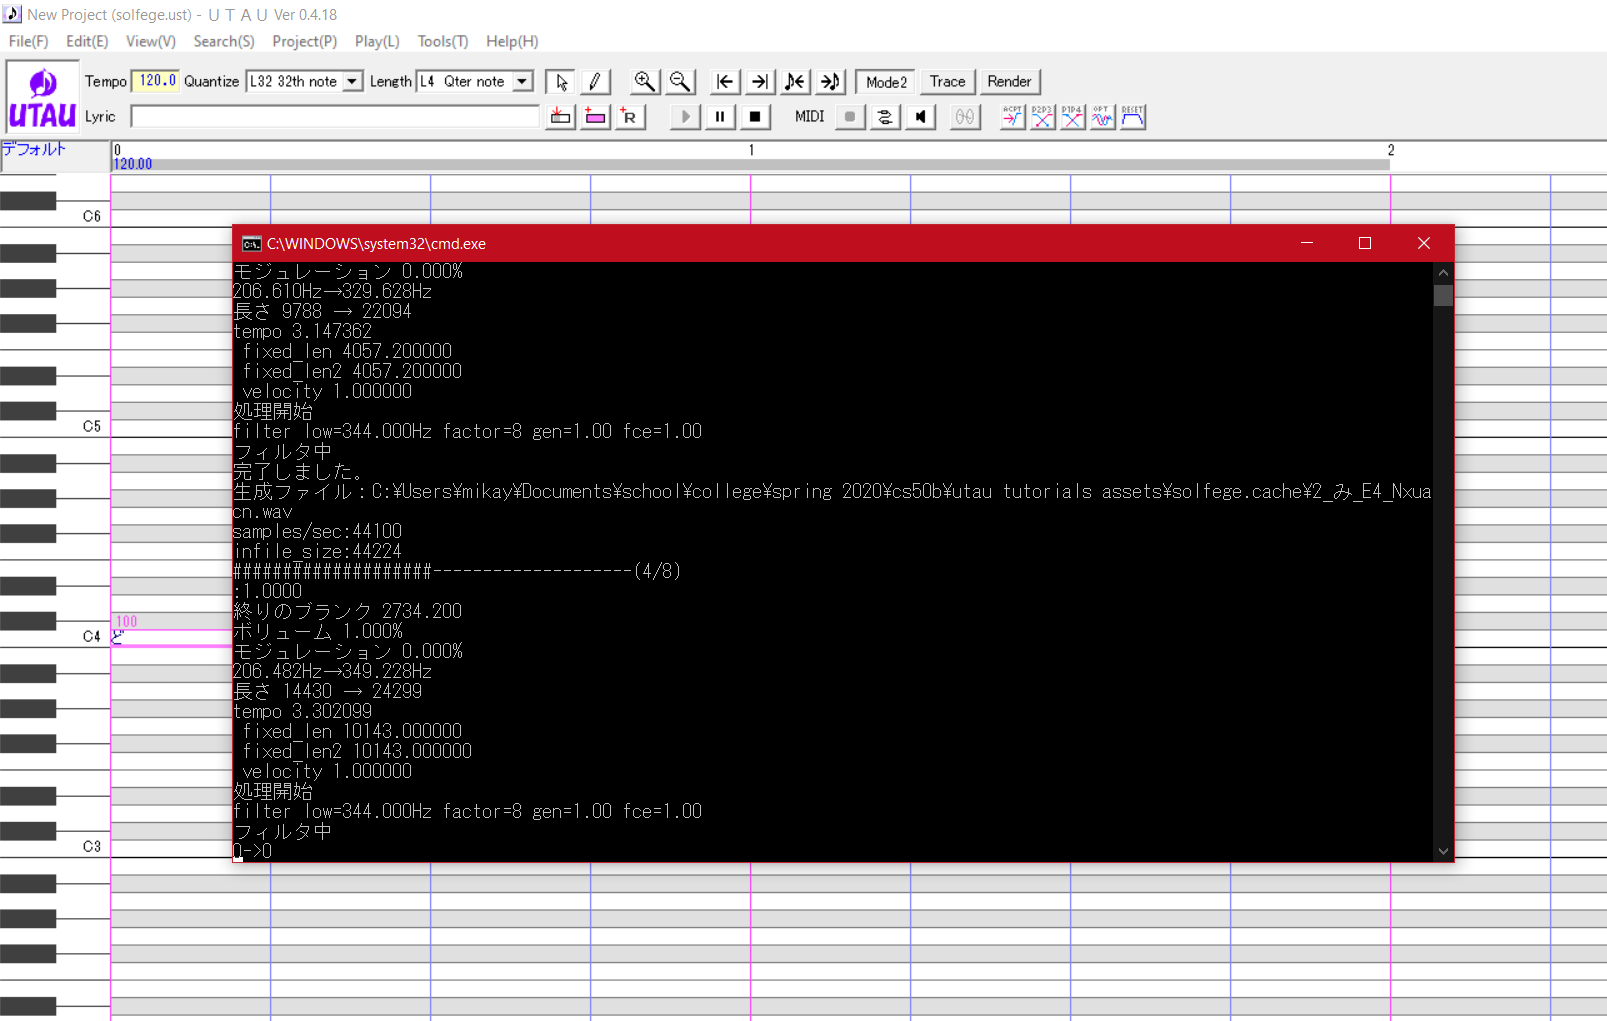
Once the process is done, UTAU will start playing the notes. If you can’t hear anything, make sure your speakers are on, your audio is working, UTAU isn’t muted, etc.
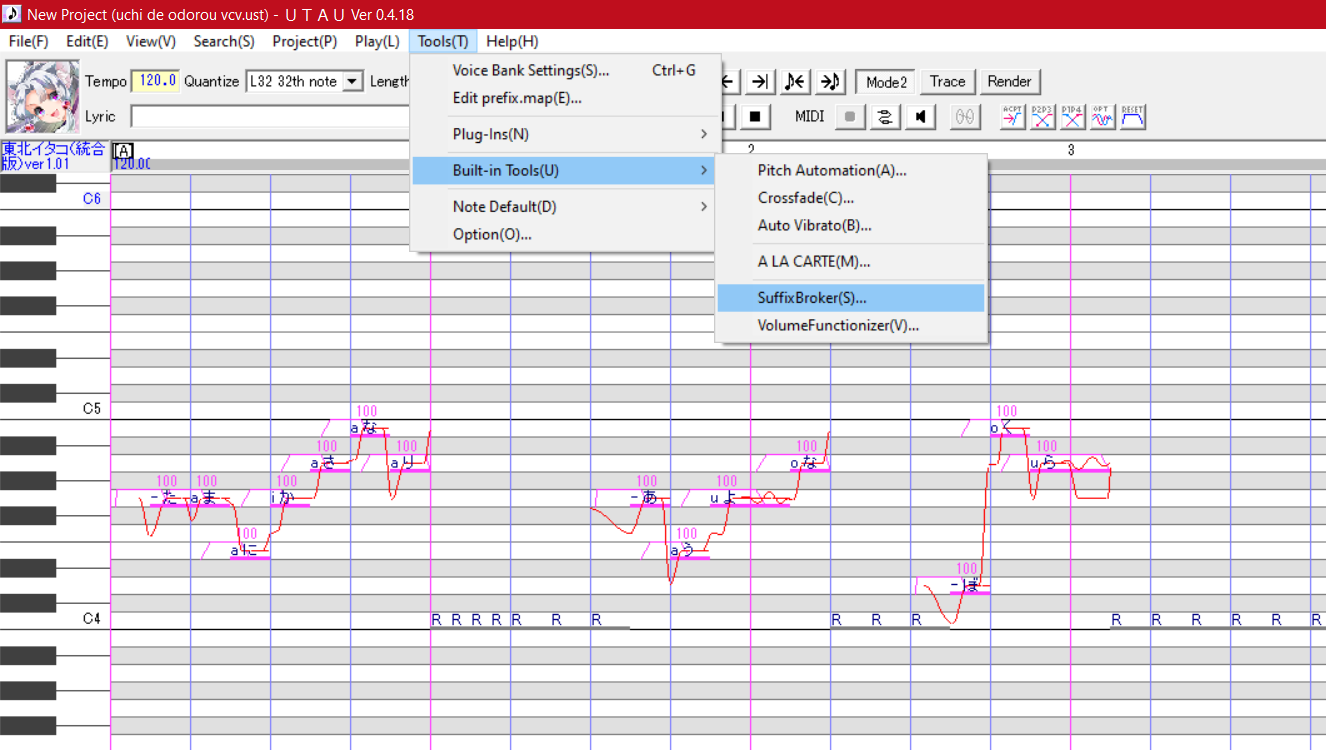
You might be using a UST file with lyrics that your UTAU can’t read. This is an incredibly common problem. Generally, CV UTAUs will read hiragana, and some can also read roumaji (latin letters). An UTAU like Kasane Teto only reads hiranaga. Makes sure your UST has lyrics in hiragana with only one character per note. If you see notes like “a か” or “n り” with a latin letter followed by a hiragana character, you’ve downloaded a VCV .ust file, which is for more advanced users.
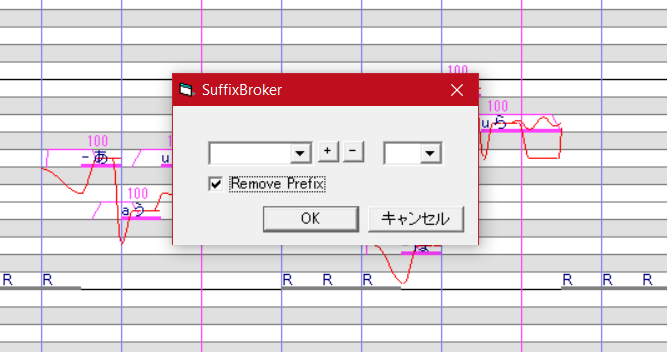
You can convert a VCV .ust to CV by selecting all the notes and going to Tools > Built-in Tools > SuffixBroker. On the ensuing dialog box, choose “Remove Prefix” and hit OK. Now the UST is CV and should play sound!

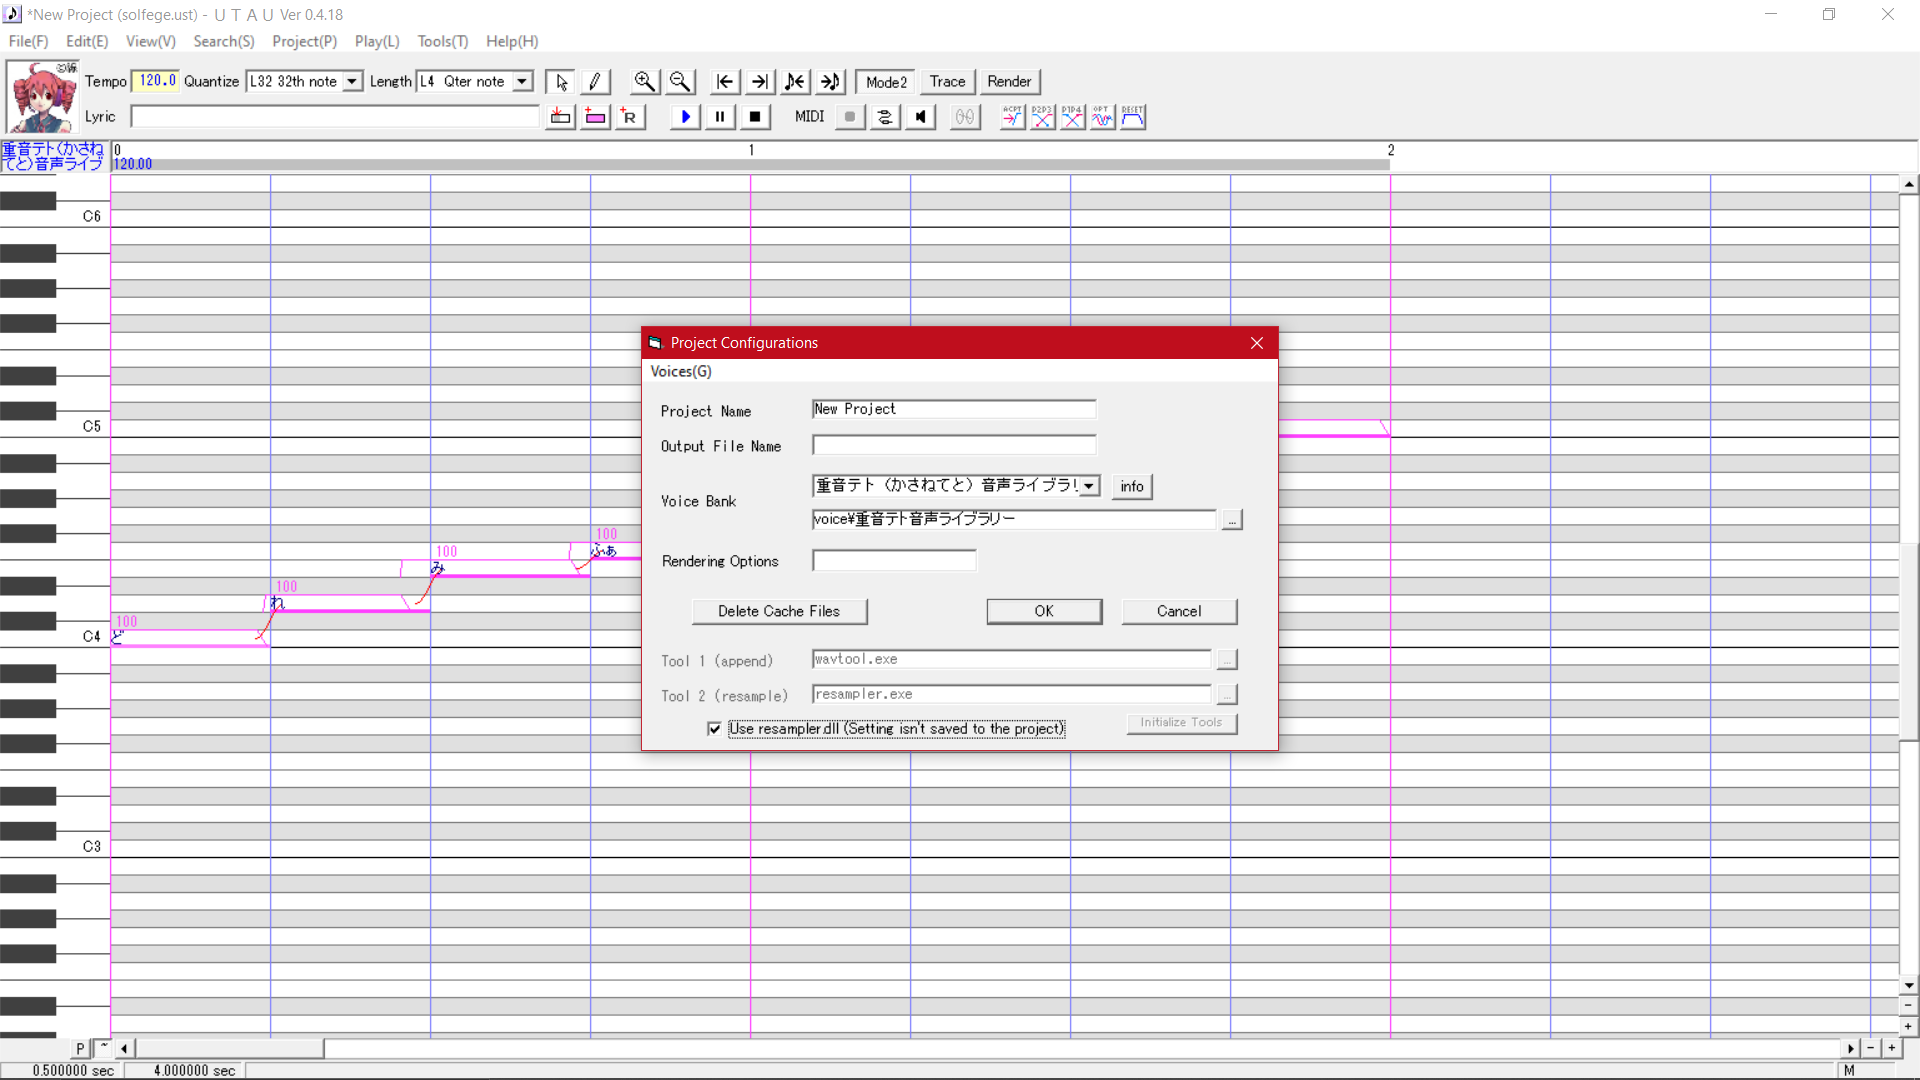
UTAU allows you to change how you render .WAV files. You can download other resamplers online (these are the executables that render .WAVs for you, but covering them is beyond the scope of this tutorial), and you can try out resampler.dll from UTAU’s Project Property. Go to Project > Project Property and click “Use resampler.dll” at the bottom of the dialog box if you want to try an alternate rendering method. Personally, I find UTAU’s default resampler and resampler.dll to sound about the same.
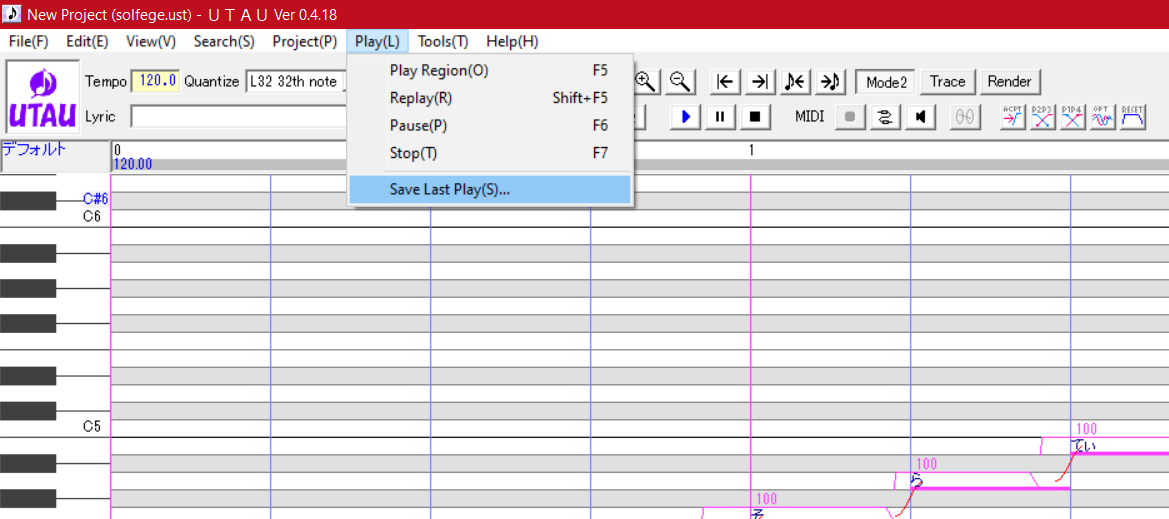
After rendering in UTAU and listening to the output, if you want to save it as a .WAV file, go to Play > Save Last Play and save the file where you like on your hard drive. UTAU only exports .WAV files for audio and if you want something like an .MP3, you should use a program like Audacity* to convert it.
*Please note: As of fairly recently, Audacity versions 3.0.3 and newer have some form of telemetry and strange data privacy concerns. I'm not aware of the current status, but for now, I'm linking to a mirror of older versions of Audacity. I highly recommend you download v3.0.2 or v.2.4.2 at this time.
Now, if you want a different singer for a project, you will need to “fit” the project to the singer’s settings. Don’t worry, this is quite simple, and you can repeat this every time you change singers.
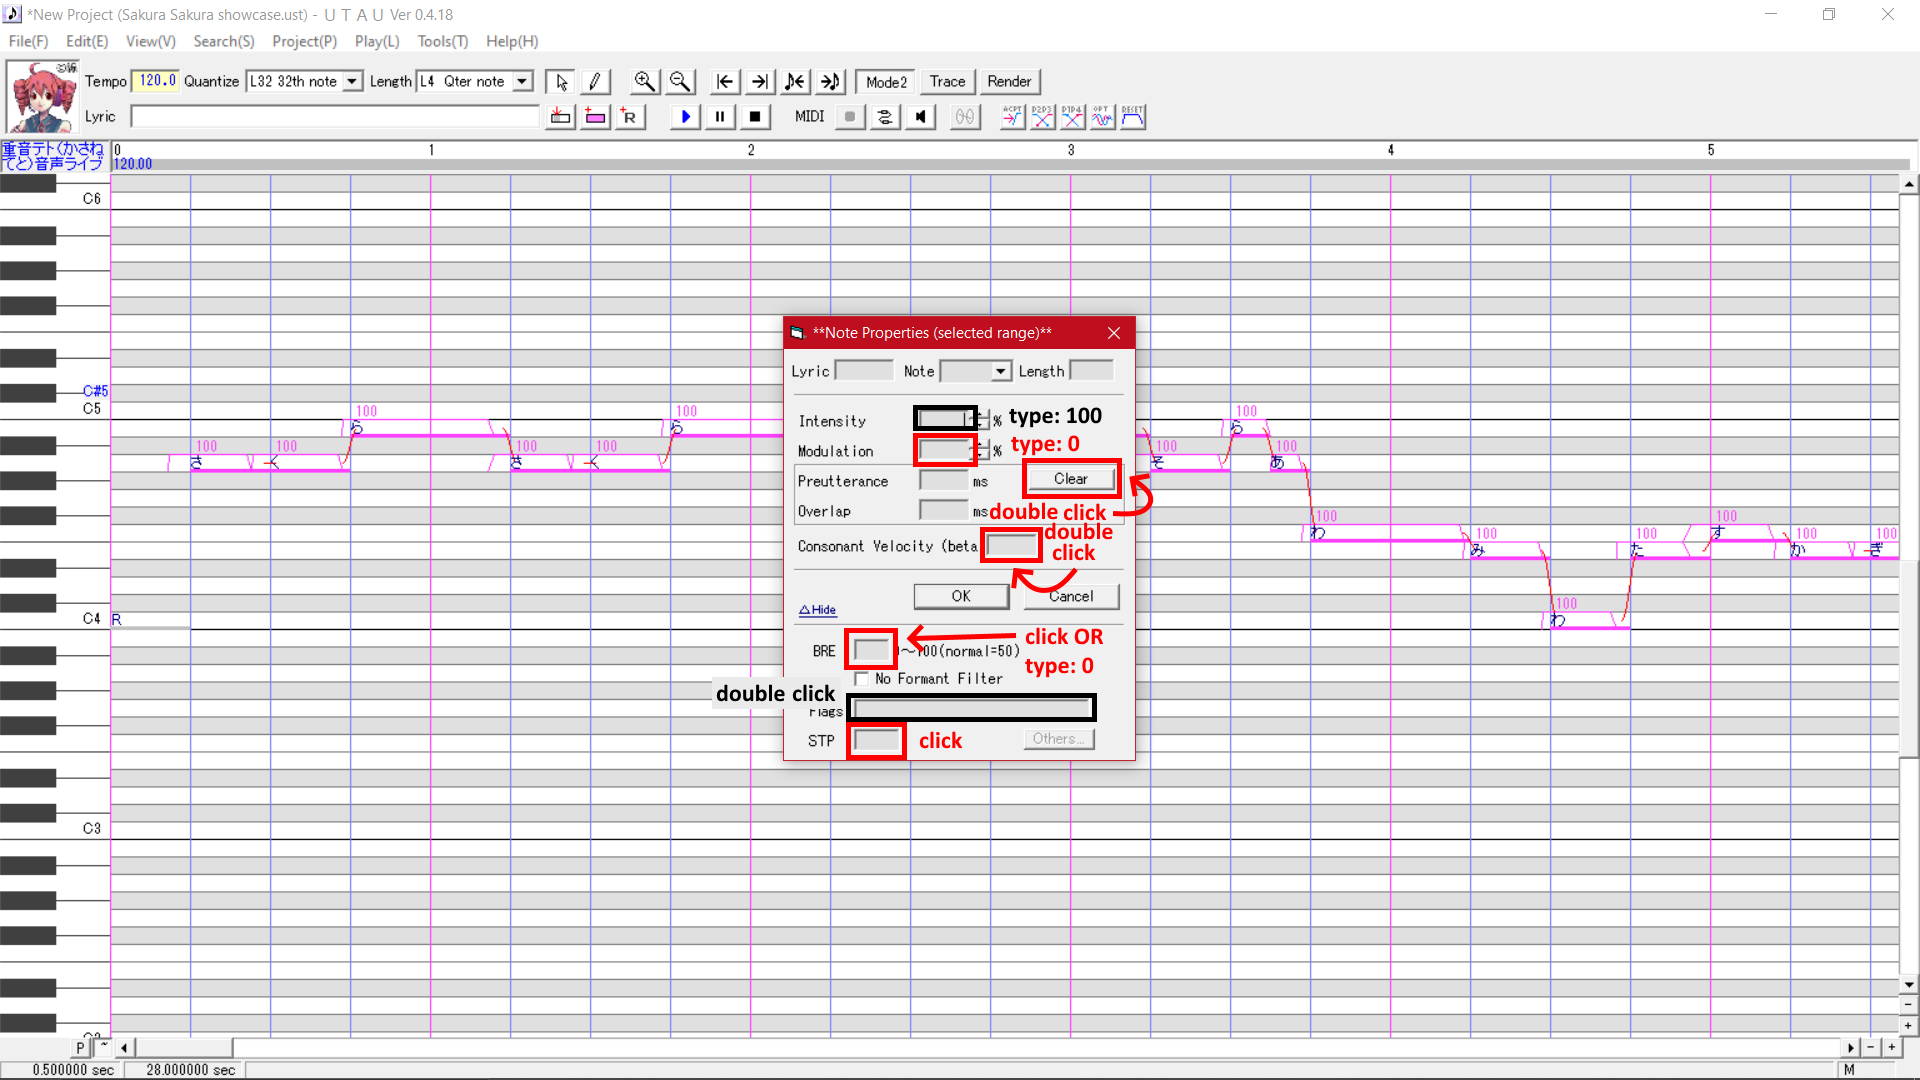
First, select all of the notes, either Control+A or Control+E works. Then go to Edit > Region Property, or press Control+E. A “Note Properties” dialog pops up. The steps to set the notes to the singer’s settings are:
You can also, optionally, click these:
The last steps of fitting a .UST to a voice require you to press buttons at the top of the UTAU window in the toolbar.

Always remember to save your progress. If you downloaded a .UST, you should “Save As” a new .UST so you have the original.
If you’re looking for USTs, you can google “[name of song] UST” or “[name of song] VSQ” for popular songs. Most UTAU users use UTAU to sing in Japanese, so popular J-Pop or original songs made in UTAU or VOCALOID are much more likely to have existing .UST/.VSQ files. The UTAU community often shares their project files for originals and covers of songs quite often!